灰度变换和空间滤波
一、实验目的
1.掌握灰度变换和空间滤波的方法
2.基于Octave实现
二、实验要求
1.使用拉普拉斯算子进行图像滤波
2.尽量不要直接使用软件中已提供的方法
三、实验过程
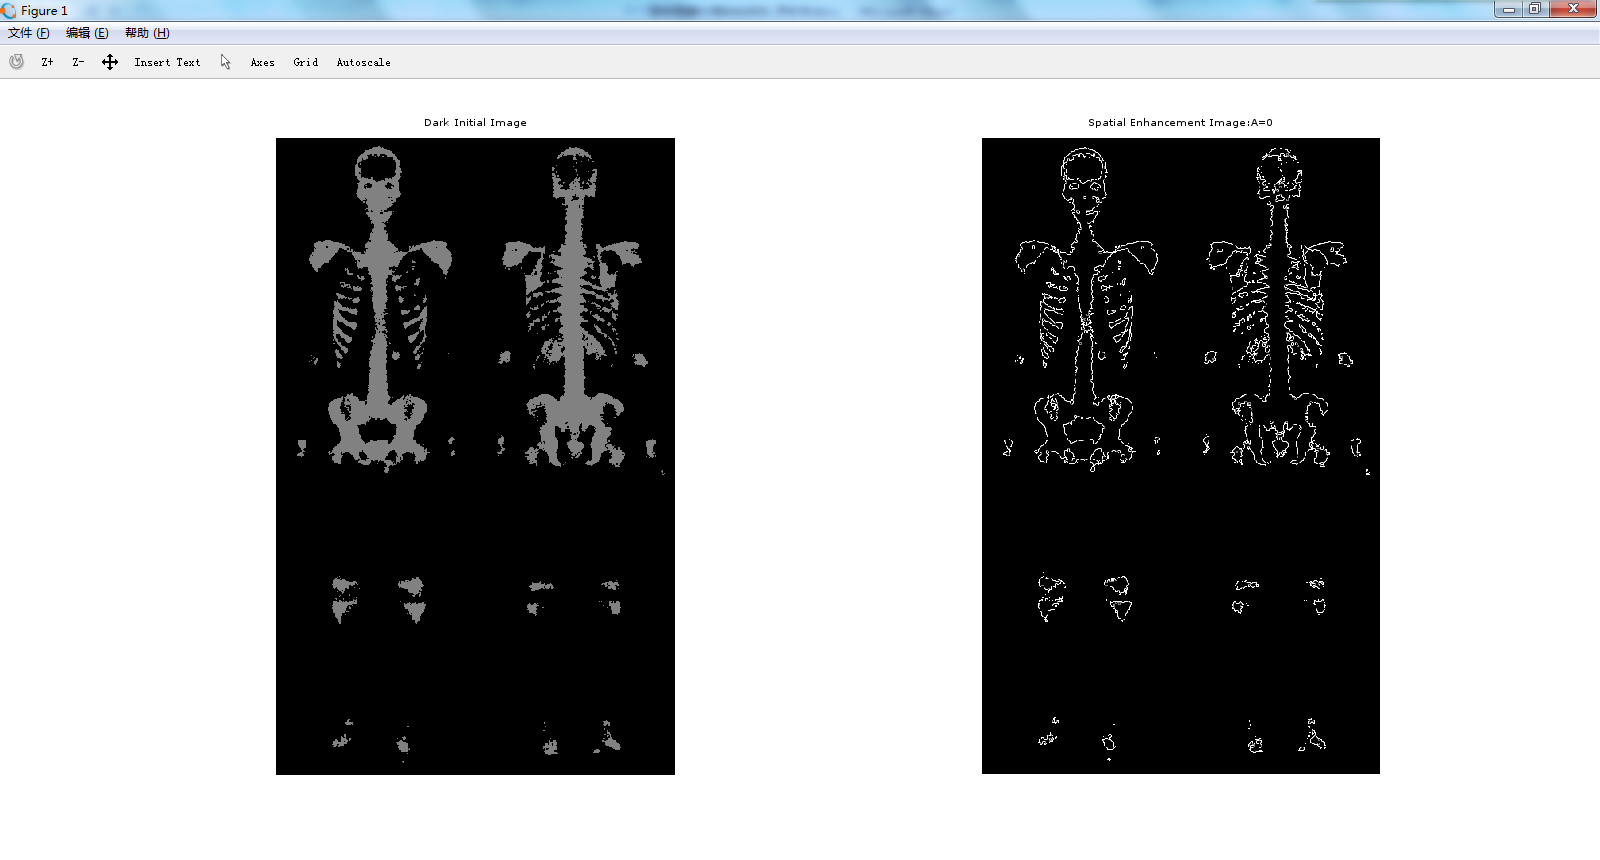
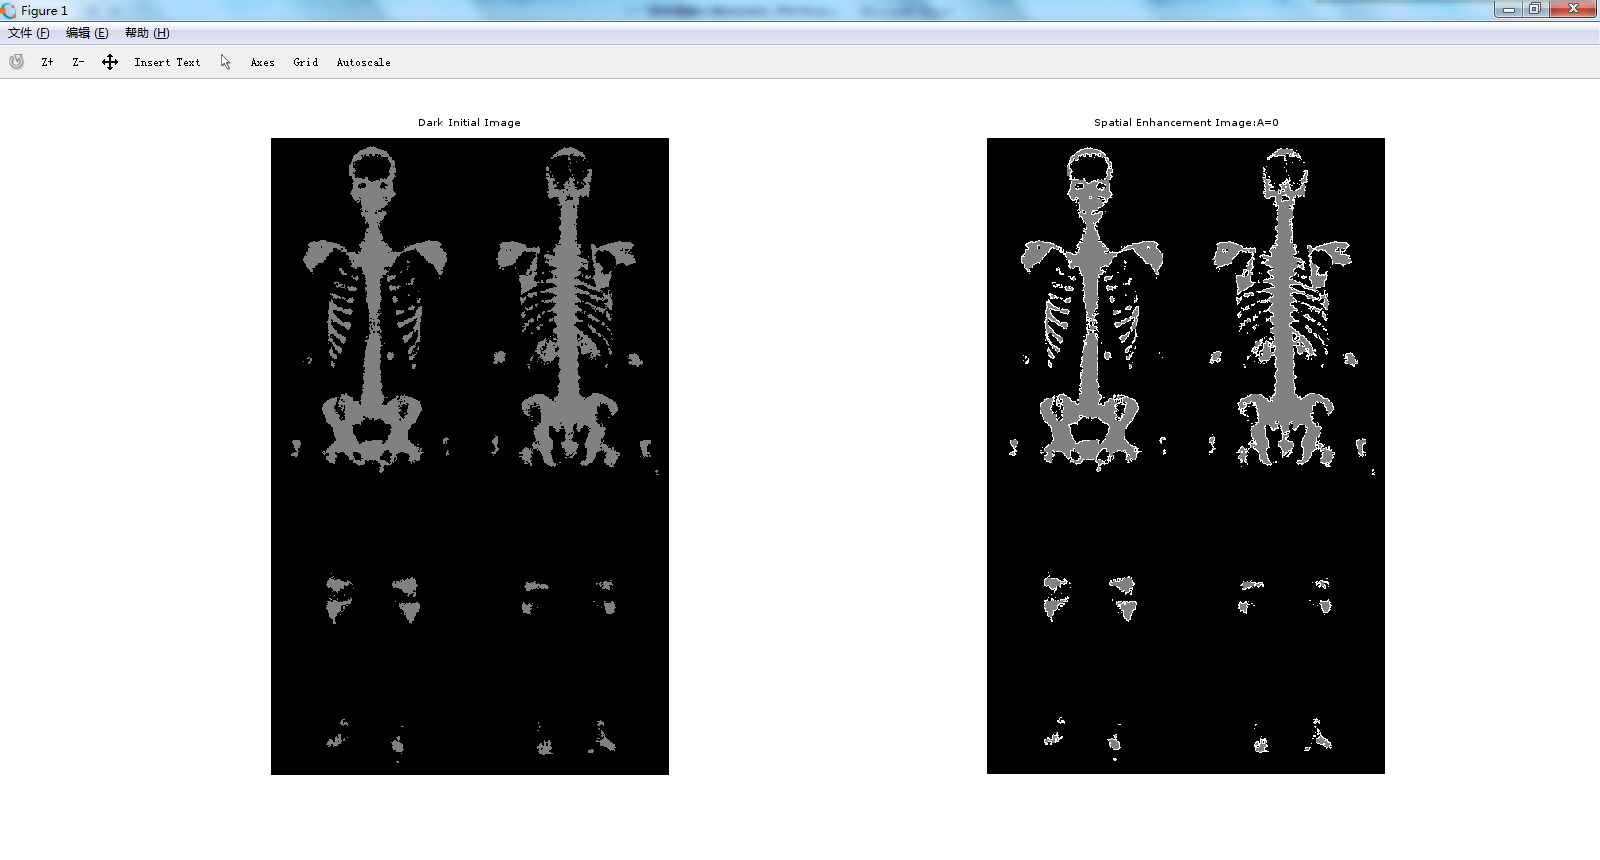
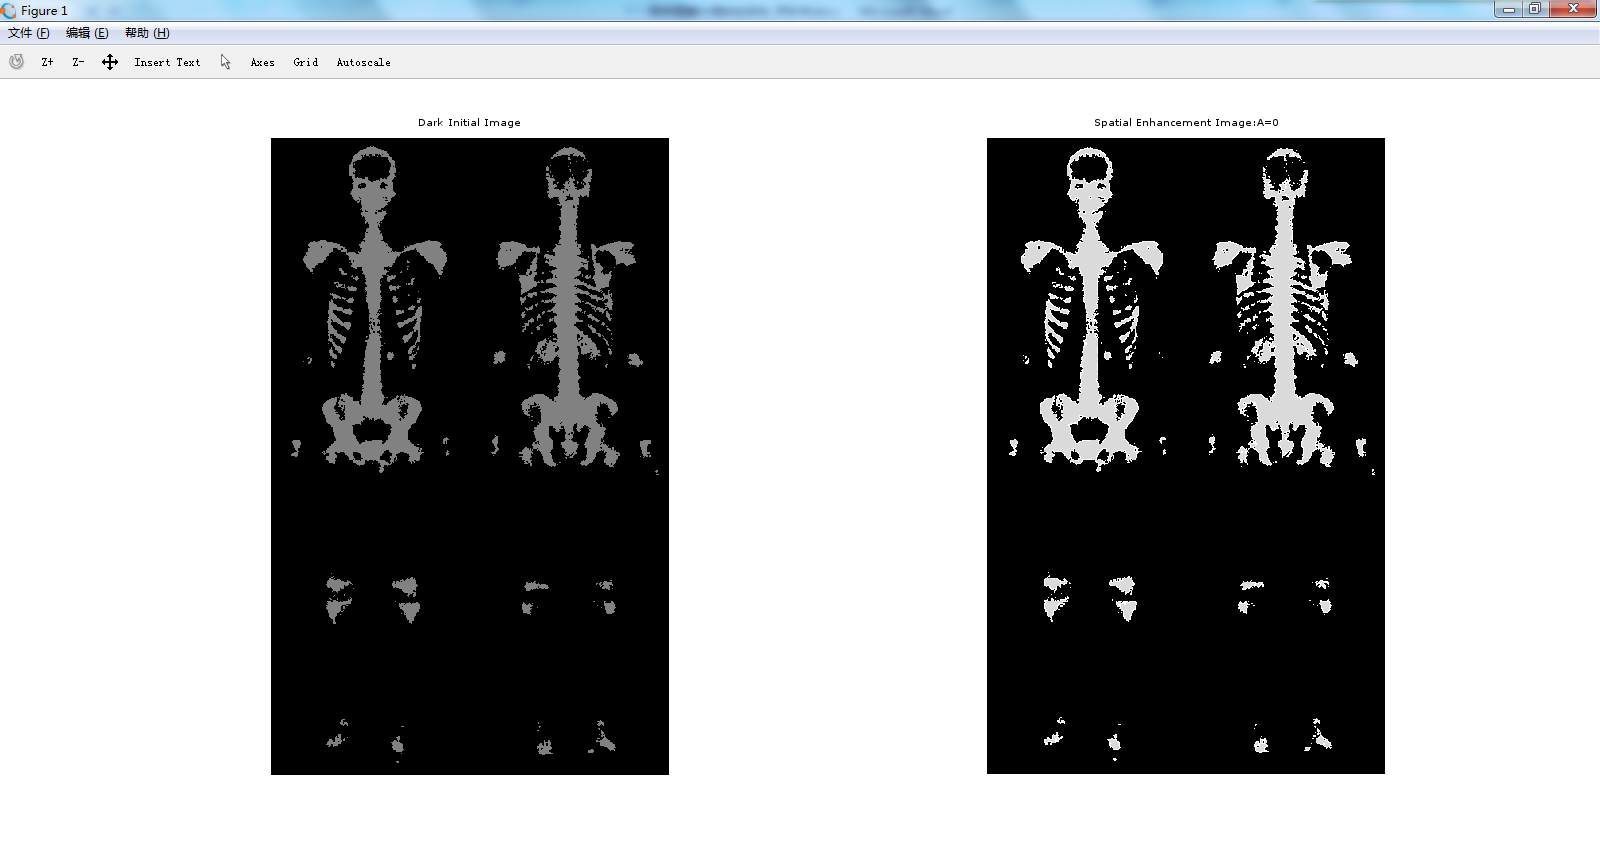
1.实验程序如下:实验结果分别对应图1-1、1-2、1-3。运行时只需要同步更新算子即可。
function s=P2_Spatial_Enhancement(initial_image)
temp_image=imread(initial_image); %读入图像
darker_image=imadjust(temp_image,[0.1*2550.3*255],[0 128],3); %图像亮度变换:原图像变暗
subplot(2,2,1);
imshow(darker_image); %显示变暗后的图像
title('DarkInitial Image');
%Laplacian ofinitial image computed with the mask in SW using A=0
w1=[-1 -1 -1;-1 8-1;-1 -1 -1];
%Laplacian ofinitial image computed with the mask in SW using A=1
w2=[-1 -1 -1;-1 9-1;-1 -1 -1];
%Laplacian ofinitial image computed with the mask in SW using A=1.7
w3=[-1 -1 -1;-19.7 -1;-1 -1 -1];
c=class(darker_image);
[rows, cols,channels, tmp] = size(darker_image);
[wrows, wcols,tmp] = size(w1);
darker_image =padarray(darker_image, floor([wrows/2, wcols/2]), 0);
if (mod(wrows,2)== 0)
darker_image = darker_image(1:end-1, :, :);
end;
if (mod(wcols,2)== 0)
darker_image = darker_image(:, 1:end-1, :);
end;
for i =channels:-1:1
spatial_en_image(:,:,i) = filter2(w1,darker_image(:,:,i), "same");
end;
spatial_en_image =cast(spatial_en_image, c);
subplot(2,2,2);
imshow(spatial_en_image); %显示滤波图像
title('SpatialEnhancement Image:A=0');
四、实验结果
1.skeleton_orig.tif(原始图) 关于实验结果图像的说明:左侧均为原图变暗的图像,右侧分别为A=0、A=1和A=1.7时的滤波图像。
仅作参考
评论

2015年12月03日
admin
1206
1206